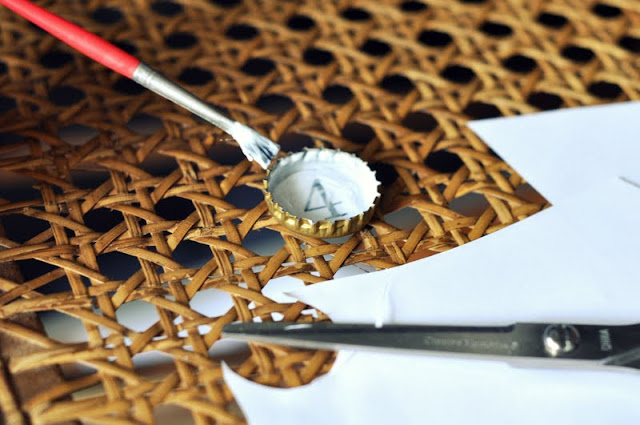
This little idea has been swimming in my head for a while now, and it was so fun to finally make these. I was delayed a bit as I first had to gather a little collection of bottle caps, enlisting helpfully thirsty people to contribute for a few weeks until I had 10.
Then I sorted through the microsoft fonts and decided on this one: SimSun-ExtB for it's simplicity. I printed several out, trying to get the right size and in the end used some numbers in size 62 and some in 49ish for extra-fun variety.
At this point it would have been neat to have some sort of crafty circle punch, but I have nothing anywhere near that nifty, so I just eye-balled and cut and trimmed a circle that fit and then used that as I guide for the others.
Then I got out my Mod Podge and the only paintbrush I could find in my kiddos' craft cupboard.
Brushed some Mod Podge on the bottom of the cap, put the number in and then coated the top.
Then hot-glue these heavy-duty magnets to the backs, which my favorite Sister picked up for me at Walmarts.
At this point, I decided they looked a bit to crisp and white, so I got out some Old English furniture polish.
Added a bit of the polish to my glue plate, brushed a coat of it on top of the dried Mod Podge, and wiped it mostly off with a paper towel.
So here they are: sweet-little-antiqued-numbered-bottle-cap-magnets.
And really, since I already had the Mod Podge and furniture polish, the only cost was the magnets, which were $6 for 50/ $1.20 for the 10 I used - woohoo.
Guaranteed to make your fridge (or cute chalkboard) feel extra-special-pretty.
Find other Easy-Peasy, Simple-Lovely Tutorials {HERE}
{Linking to Blue Cricket Design, Remodelholic,
Funky Junk Interiors, Tip Junkie , Just a Girl, & Lettered Cottage}
Funky Junk Interiors, Tip Junkie , Just a Girl, & Lettered Cottage}


You're so smart and crafty i can't hardly take it. :)
ReplyDeleteOh, I am in love with this project! How cute and practical!!
ReplyDeleteI love this, I saw it in Martha Stewart LIVING a year or two ago and have been saving bottle caps thinking someday...Martha (or her minions) did it with photographs circle-punched. One thing she did for the finish that you might like was buy a bottle of clear resin/plasticky stuff at Michael's or somewhere to fill the cap/bubble the top--it was cool.
ReplyDeletecute and creative!
ReplyDeleteCailan, I have spent 2 cups of morning coffee perusing your beautiful and peaceful blog! Your ideas are creative and your images are so artful! I want to follow you but it seems that blogger is having some problems right now!So I've bookmarked this page... I'll be back to follow and see what you are up to!
ReplyDeleteSo nice to meet you today!
Yvonnne
Love this project! I've been collecting bottle caps to do something similar. Definitely going to bookmark your tutorial to use!
ReplyDeleteVisiting from Remodelaholic!
Super cute idea! I told my husband last night he needs to start saving bottle caps. I'm pinning this and will link back when I post about mine.
ReplyDeleteI love these. What a great idea.
ReplyDelete~Sam
They are cute!
ReplyDeleteThese are great, I used to make them in little sets of 4 with scrapbook paper in them as gifts. You can also fill them with resin.
ReplyDeleteWhat a great tutorial! Might even be a cute father's day gift idea with Dad's favorite beer or soda! I can't wait to try! Following you thru a link party!
ReplyDeleteI'm kind of making ones like this, but they're yellow ribbon ones to help support our troops here in michigan at the 1462nd unit. I'm making pins and magnets. I love how you did your's!! I bought the same magnets, and did the opisite of what you did, and for some reason they won't stay up on the fridge, because they're to heavy I think. :-( So I'm going to try your way and see if that helps. Thanks for the idea! Love your magnets, a great idea for maybe a wedding seating chart. :-)
ReplyDeletevery cute! i need to find some bottlecaps, stat!
ReplyDeleteAmy @ www.themombot.com
What a great idea! I love your blog!! :) I am your newest follower! I will be keeping an eye on your blog to learn new things. If you would like to take a look at my blog (and maybe be my follower too) that would be wonderful! I'm new to the blogging world but can't wait to contribute to this newfound crafting community!
ReplyDeleteCheers!
Sarah M.
www.diyordont.blogspot.com
I Love this idea. Great use of the old english polish! lol I would have not thought of that.
ReplyDeletethese are adorable. id love to feature them. please let me know if that would be ok with you.
ReplyDeletelauren
loving these magnets! Great job!
ReplyDeleteI like how you antique them as well...kinda a vintage feel to it.
Natalie
Those are so great! I'm featuring it on my "Top 10 Awesome Recycled Craft Projects" today at www.cheapcraftymama.com, be sure to grab a button if you want. Also I would love for you to share this (and any other creations) at my "Pin It and Win It Wednesday" starting this evening!
ReplyDeletewow...very creative
ReplyDeletedefinitely I vl make it for my board....
Yaa I wil use it for my dream board
I'm loving these magnets! So cute and vintagey looking without being super pricey! I could totally see these in a Restoration Hardware or Pottery Barn catalogue! :) http://www.craftbaby.com
ReplyDeletevery cute idea!
ReplyDelete